Okta
Configure Okta
This guide covers how to configure Okta as an Identity provider for OpenFaaS IAM.
-
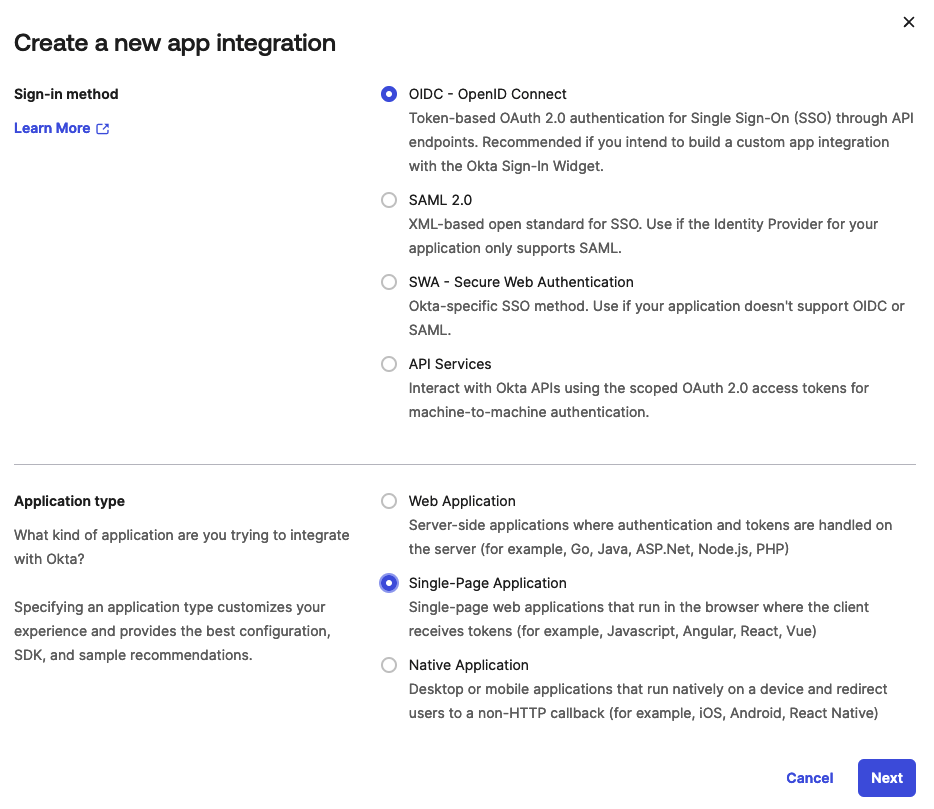
Create a new App integration for OpenFaaS
Create am OIDC - OpenID Connect app integration using the Single-Page Application type.
-
Add sign-in redirect URIs
Add
http://127.0.0.1:31111/oauth/callbackfor the CLI. If you are deploying the OpenFaaS dashboard, add the redirect URI for your dashboard e.ghttps://dashboard.openfaas.example.com/auth/callback.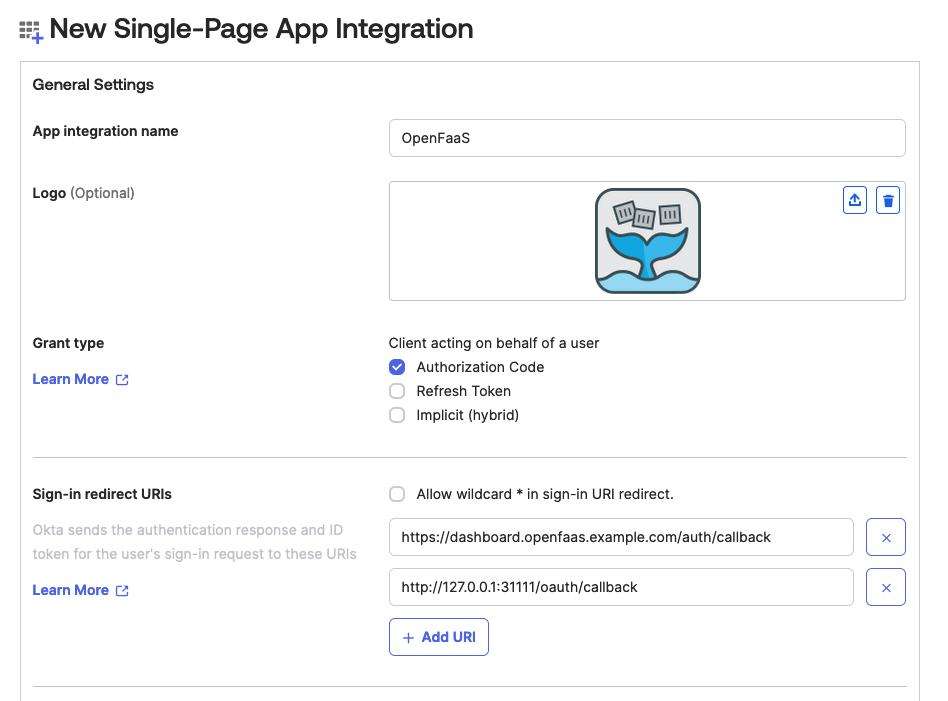
-
Register Okta as a JwtIssuer with OpenFaaS
Create a JwtIssuer object in the
openfaasnamespace to register Okta as a trusted issuer for OpenFaaS IAM.apiVersion: iam.openfaas.com/v1 kind: JwtIssuer metadata: name: example.okta.com namespace: openfaas spec: iss: https://example.okta.com aud: - 0oaf1k34enz720UjH5d7 tokenExpiry: 12hThe
issfield will need to be set to your Okta domain.The
audfield contains a set of accepted audiences. For Okta this is the client id of your app integration.The
tokenExpiryfield can be used to set the expiry time of the OpenFaaS access token.
Optionally, if you want to enable client authentication using a client secret for the OpenFaaS dashboard create a separate app integration for the dashboard and select the Web Application type.