Keycloak
Configure Keycloak
This guide will cover how to configure Keycloak as an identity provider for OpenFaaS IAM.
-
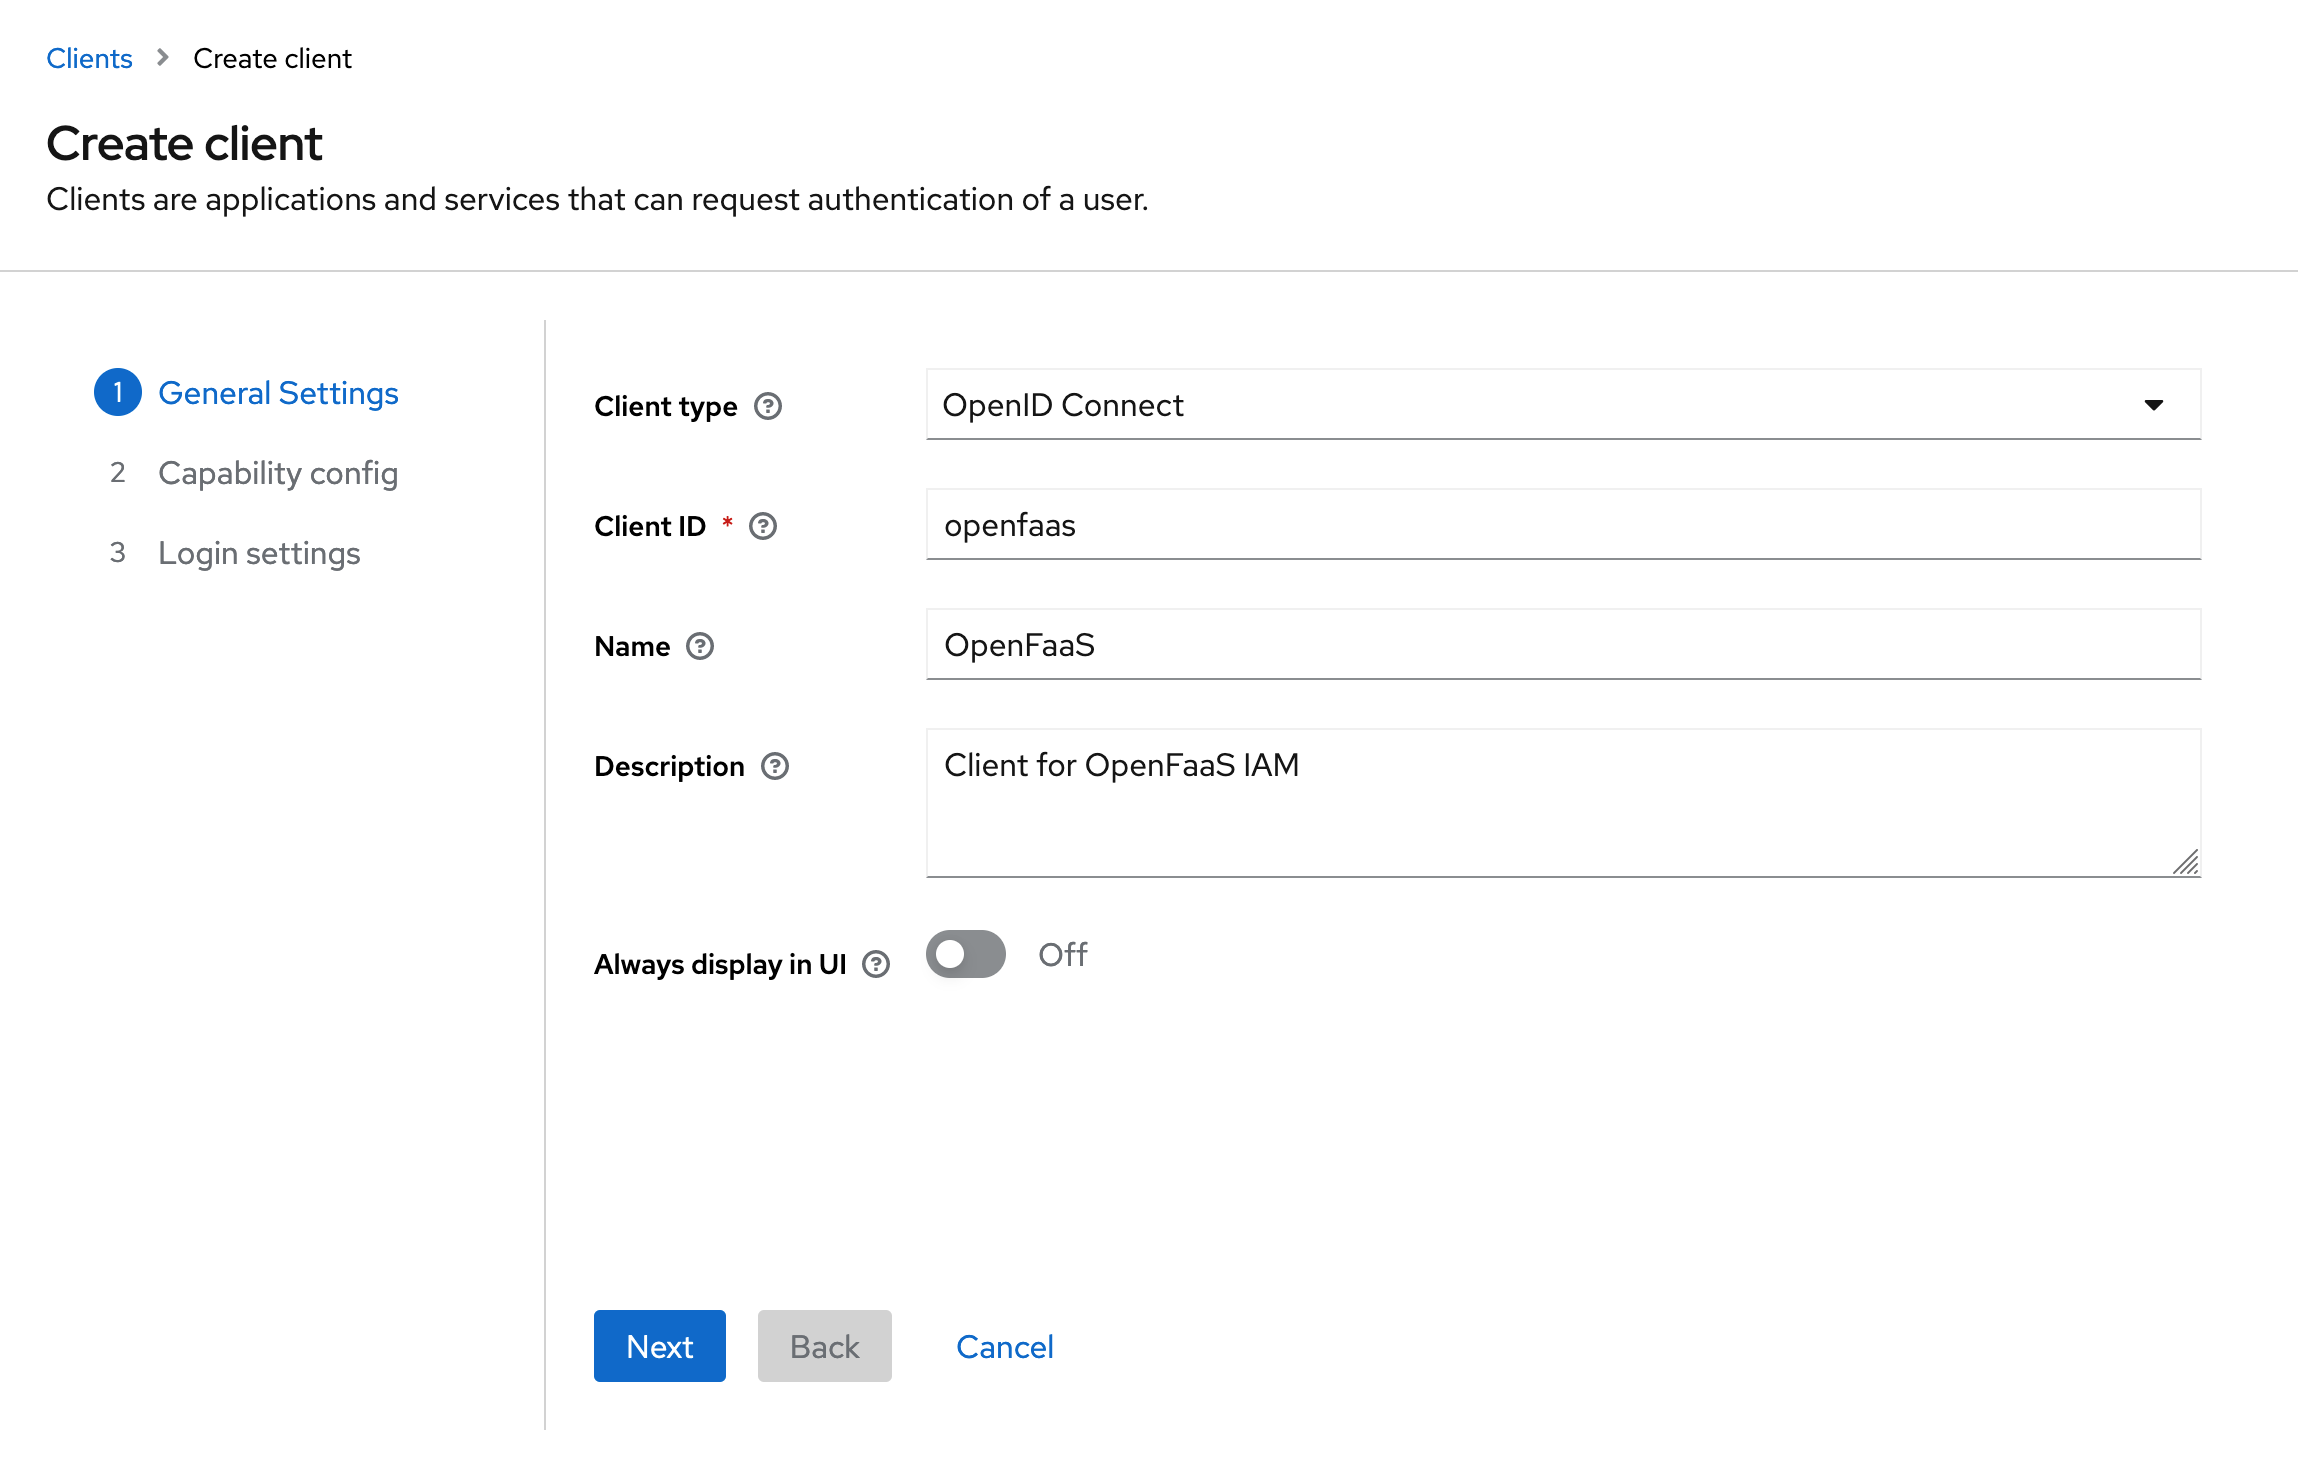
Create a new client in your Keycloak realm with Client Type OpenID Connect.
-
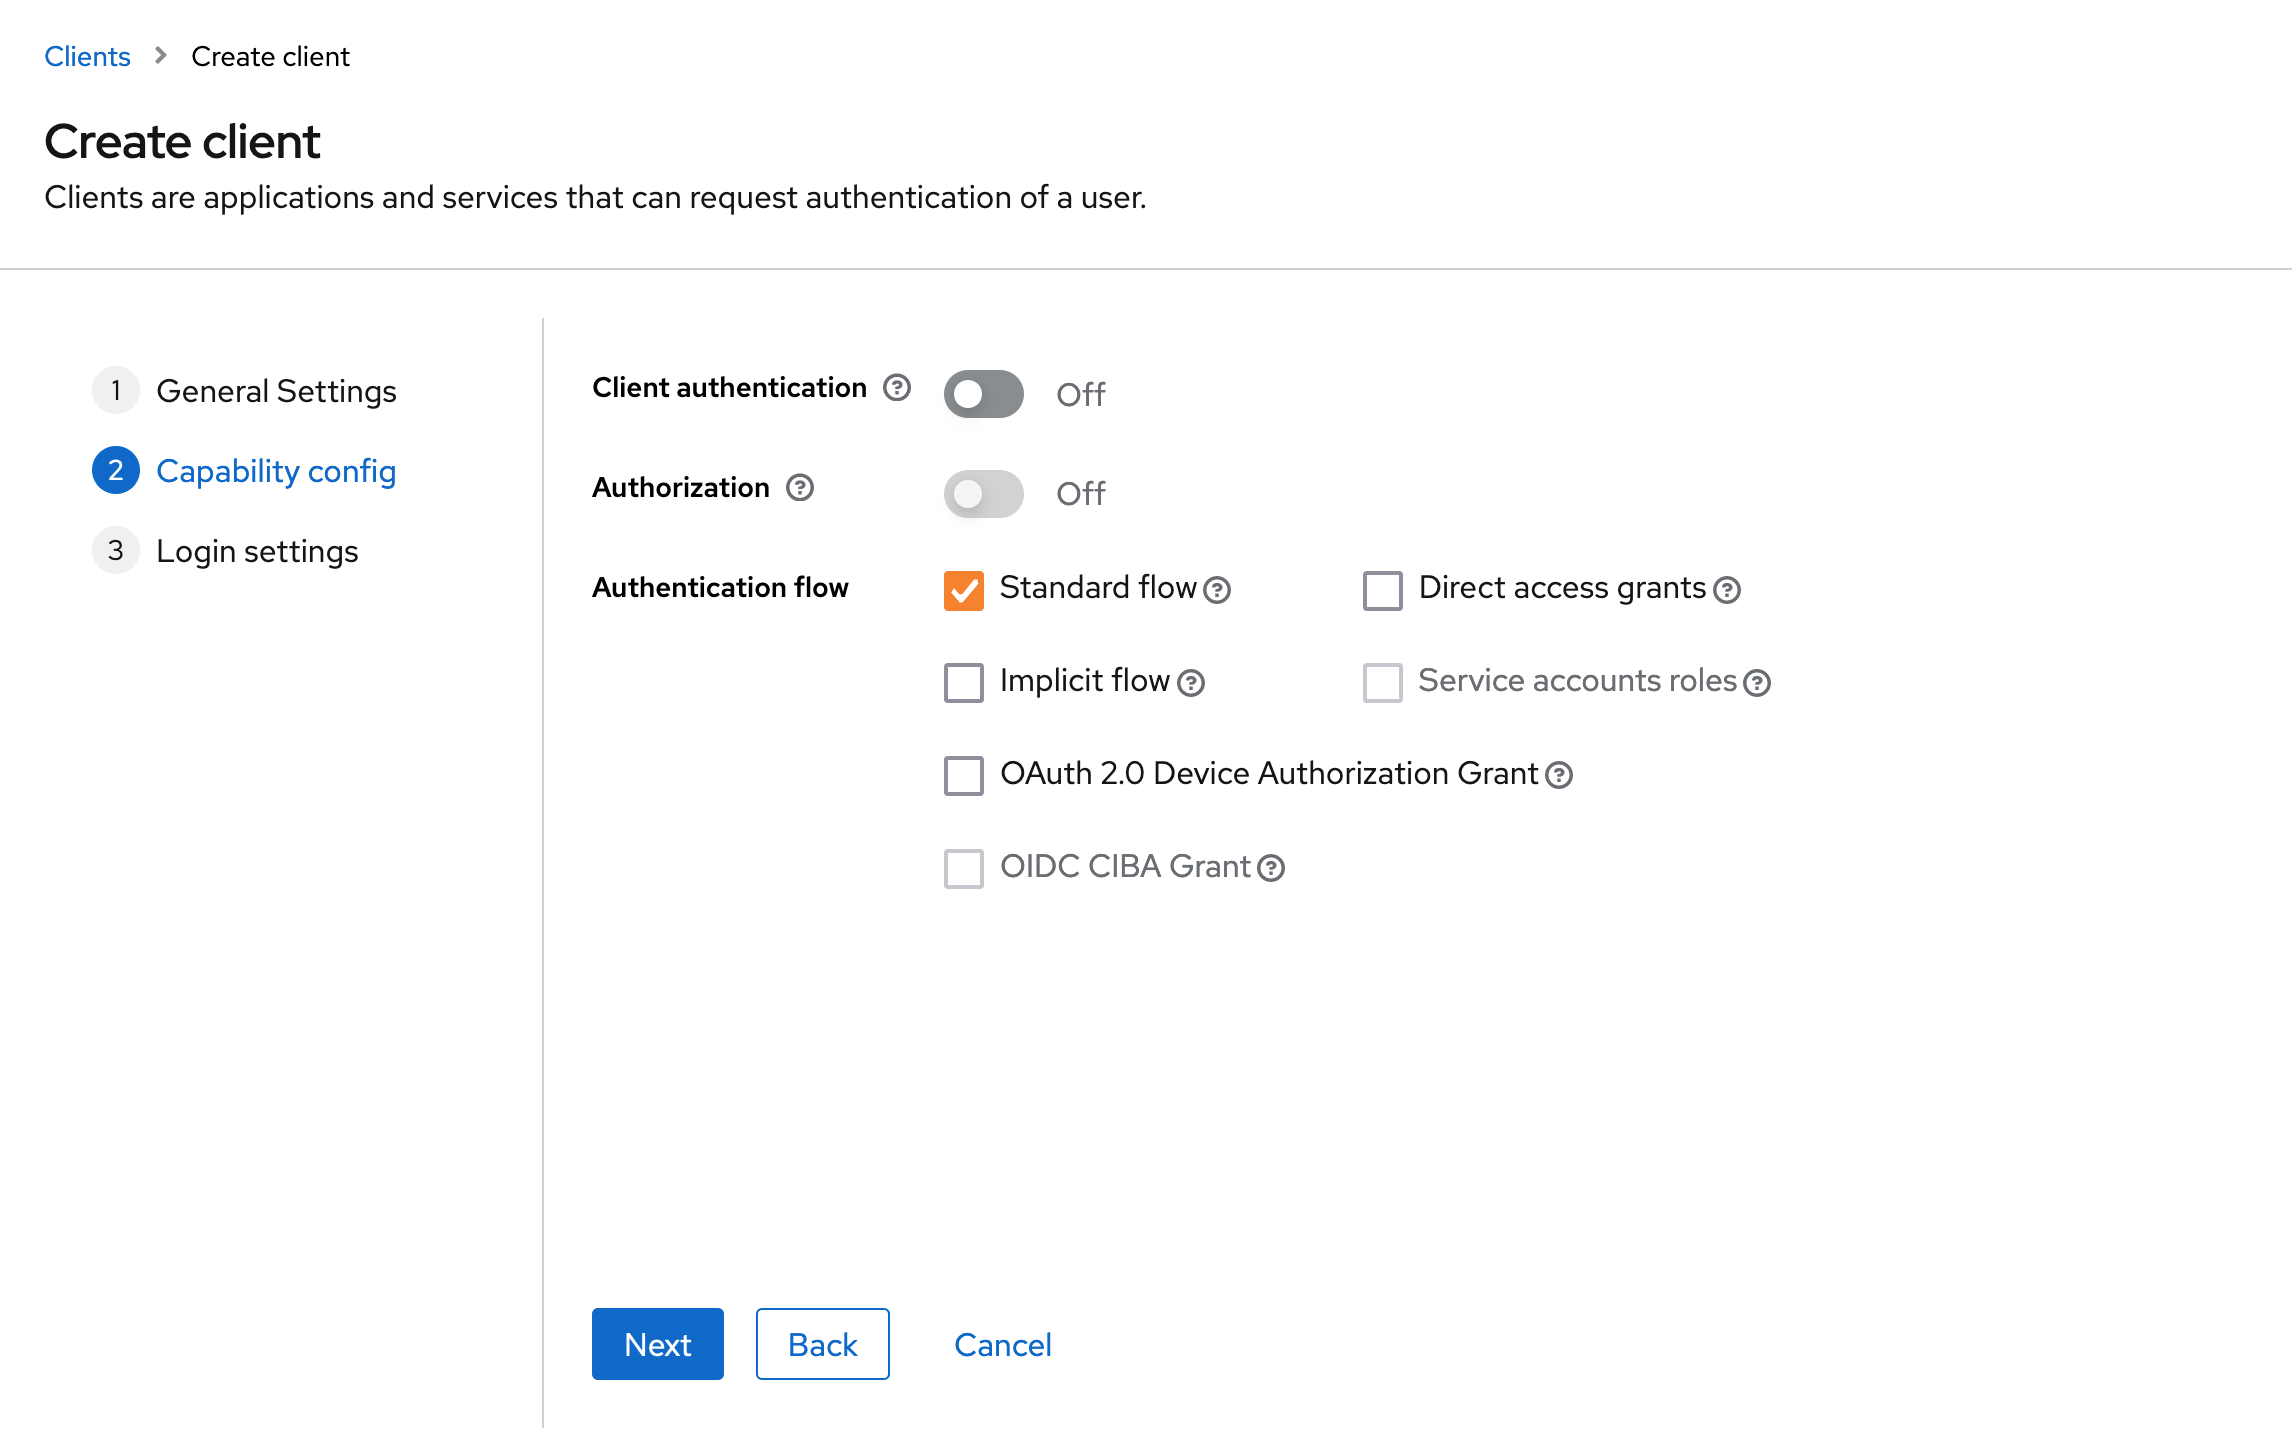
Enable the Standard Flow (Authorization Code Flow) for the client.
-
Add the callback URLs for the CLI and dashboard to the list of valid redirect URIs.
Add
http://127.0.0.1:31111/oauth/callbackfor the CLI. If you are deploying the OpenFaaS dashboard, add the redirect URI for your dashboard e.ghttps://dashboard.openfaas.example.com/auth/callback.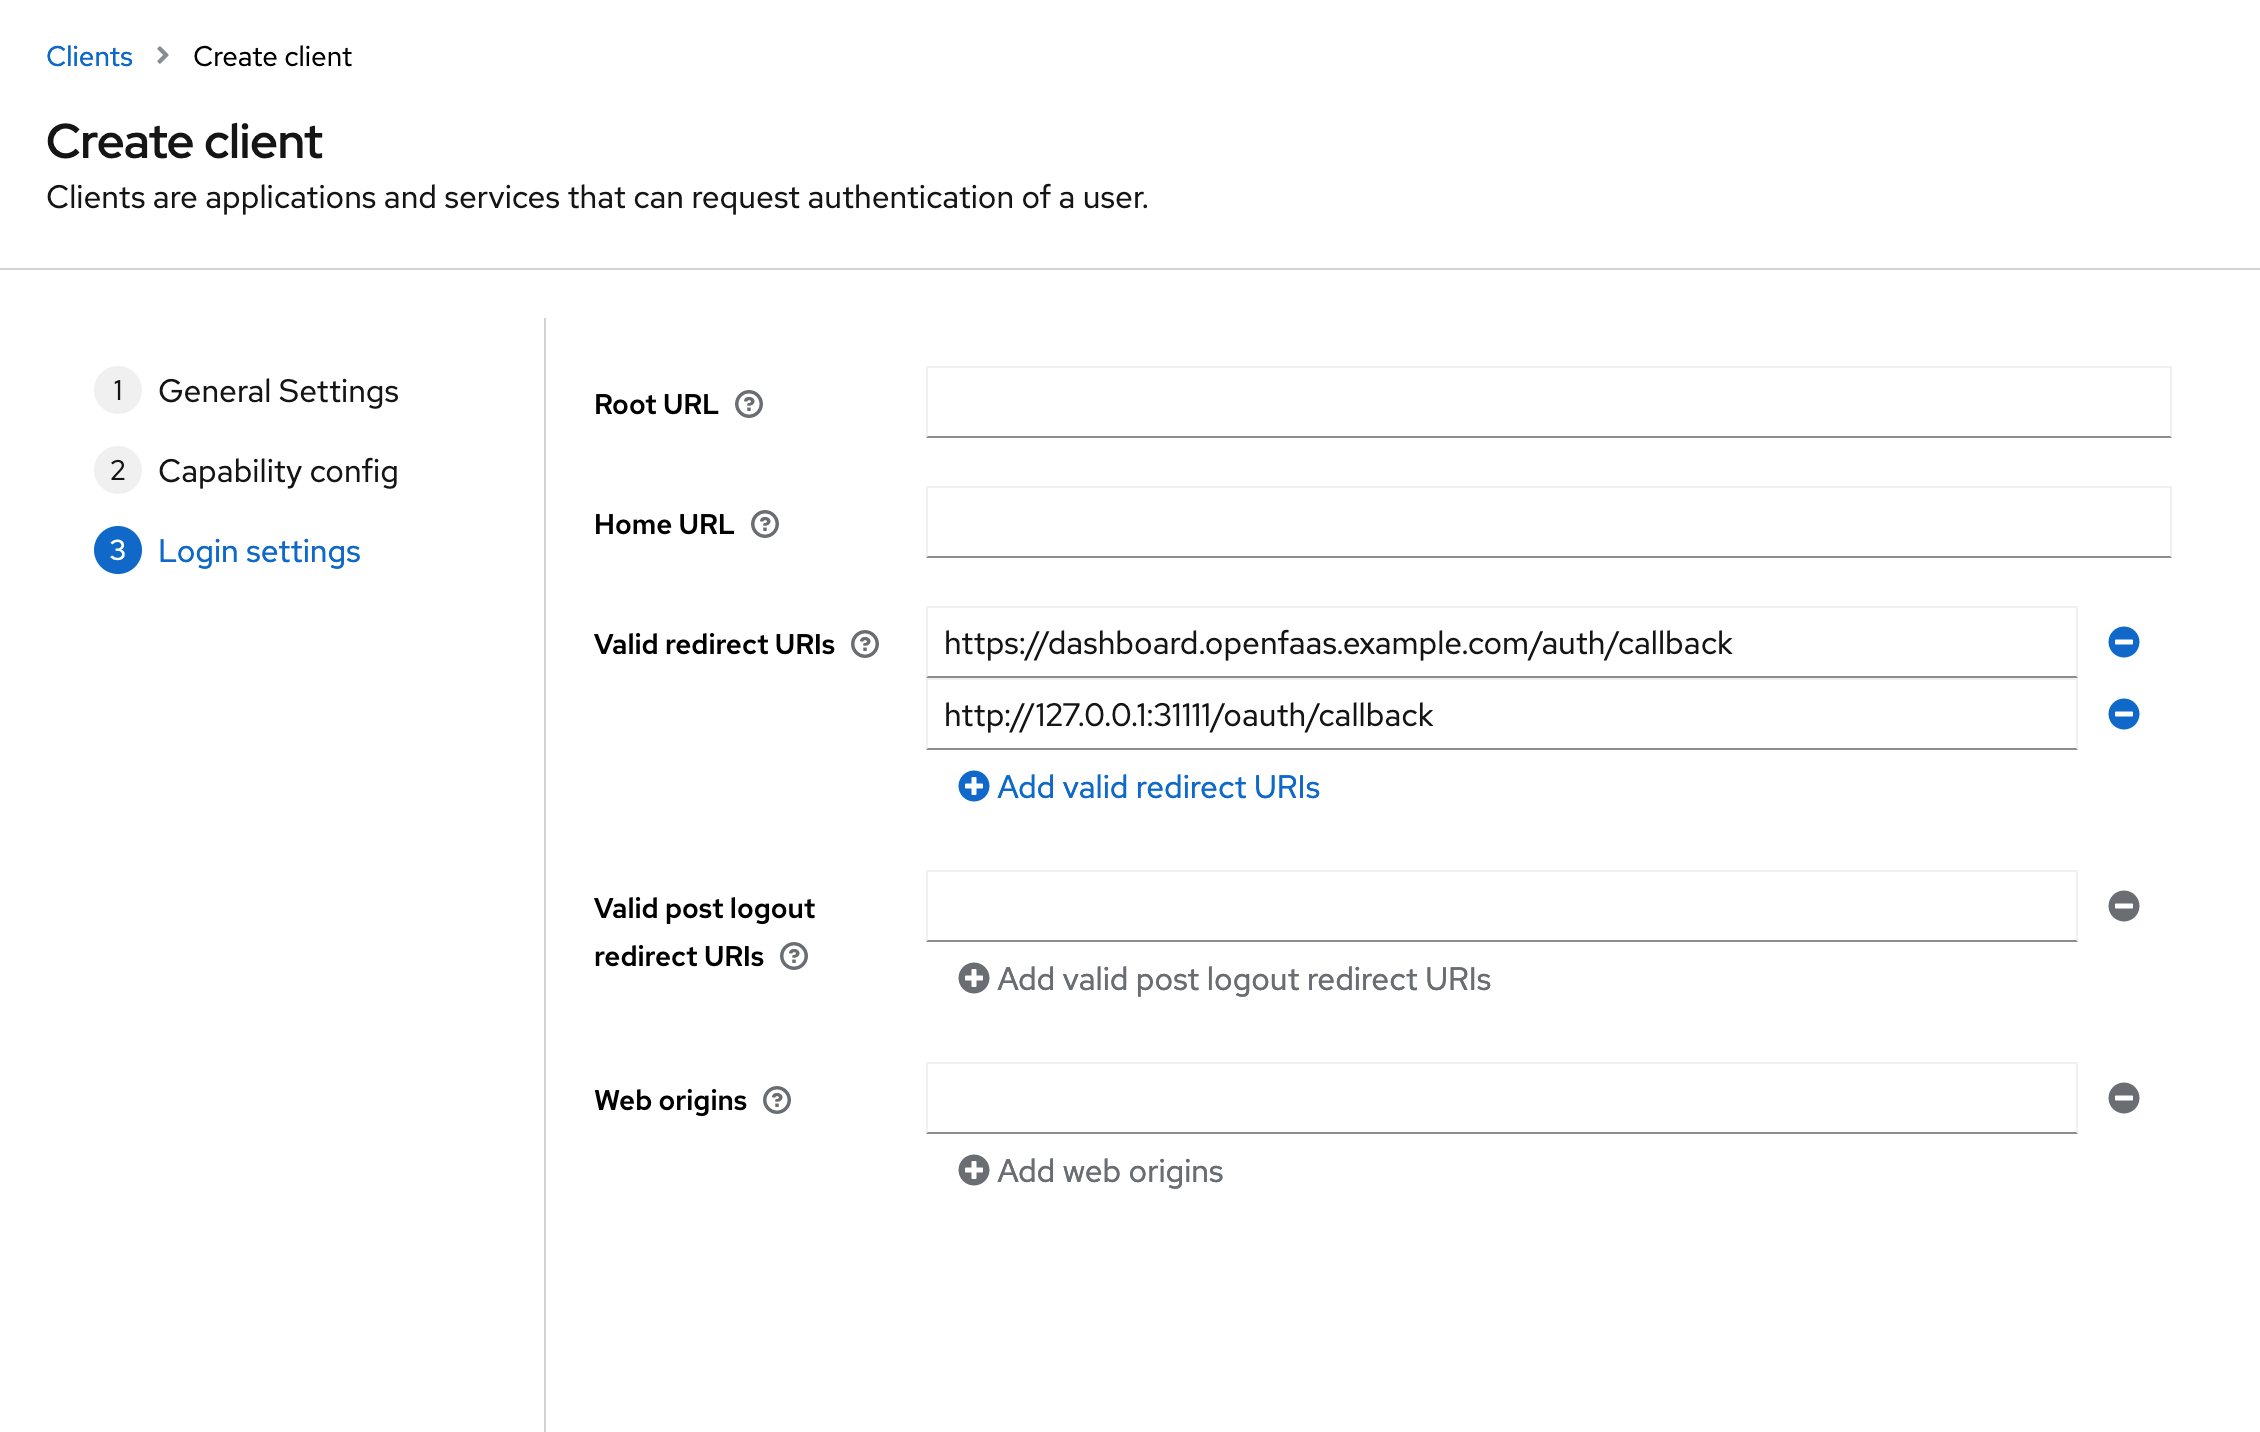
-
Register your Keycloak provider with OpenFaaS
Register your Keycloak client as a trusted issuer for OpenFaaS IAM creating a JwtIssuer object in the OpenFaaS namespace.
Example issuer for a Keycloak provider:
---
apiVersion: iam.openfaas.com/v1
kind: JwtIssuer
metadata:
  name: keycloak.example.com
  namespace: openfaas
spec:
  iss: https://keycloak.example.com/realms/openfaas
  aud:
    - openfaas
  tokenExpiry: 12h
Set the
issto the URL of your Keycloak provider.The
audfield needs to contain a set of accepted audiences. For Keycloak this is the client id that was selected in the first step.The
tokenExpiryfield can be used to set the expiry time of the OpenFaaS access token.